Skip to content

All drivers want their cars to be magical with zero repairs. Although cars are improving every day, they have not reached that magical place yet! 

As you know, cars always need regular checks and tune-ups between major maintenance and services. But, what exactly needs regular checking?

For most of us, this could be challenging! It frequently seems like every vehicle system has some sort of fluid needed for its smooth movement, and it tends to be difficult to tell which fluid is for which part.

It can also be difficult to comprehend when you have to check (or change) every fluid. Thus, to assist you with exploring the brilliant world of vehicle support, we've put together a basic list of 7 essential fluids you need to keep an eye on to keep your vehicle running easily. 

We'll give you the nuts and bolts about each kind of car fluid, tell you the best way to check their levels, and offer you some fundamental guidance on when you should consider filling them up with new oil, changing the fluid, and so on.

1. Engine Oil:

  • What is Engine Oil?

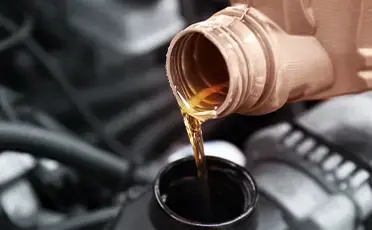
As known, engine oil is one of the important fluids that run in your car; without it, your car will encounter an immense amount of damages. 

Engine oil mainly helps in reducing friction between the moving parts of the engine to ensure everything is performing smoothly and efficiently. 

It also protects the engine moving parts from harsh conditions such as extreme temperatures, tremendous heat friction, sludge accumulation, high pressures, and more.

Recently, new cars have a built in sensor that warns the driver about engines’ oil status; whether it needs a change, a quick top up, and so on. 

However, experts advise to practice a periodic manual oil level check;  an average of 3,000 kilometers or every couple of weeks is ideal, and to always do a quick check when planning for a long road trip.

Total Lubricants - How to Check your Engine Oil
  • How to Check your Engine Oil?

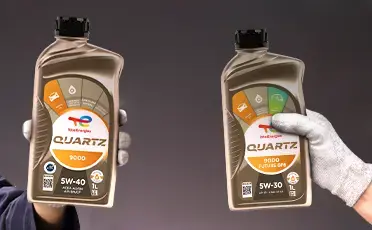
Checking your engine oil level is a fairly easy straightforward process. Always remember to check the owner’s manual for the recommended engine oil that best suits your car needs.

  1. Take the car for a small trip.
  2. Park the car on a flat surface level, and turn off your car.
  3. Let it cool down for at least 15 minutes. 
  4. Open the hood and locate the dipstick. It will be near the front of the engine, close to you, and sometimes the handle has yellow, red, or other bright colors. 
  5. Remove the dipstick carefully, and wipe it off with a clean cloth.
  6. Reinsert it in the hole, then slowly remove it and check the level.
  7. The oil mark should fall between the two hash marks located on the dipstick. 
  8. If the oil level falls below the minimum hash mark, you will need to add some oil - a quart will usually do it.
  9. Wipe the dipstick again and check it for the second time. 
  10. Still low? Continue on adding a quart and recheck it again. But be careful not to overfill it, as it can lead to other engine problems.

2. Transmission Oil:

  • What is Transmission Oil?

Many of us don't completely know the function of transmission liquid and when does it need a change.

Just as engine oil, transmission oil is another important fluid that lubricates the moving parts, acts as a cleaning operator, and keeps the transmission gears, valves, and clutches cool down. 

Experts generally recommend having a transmission oil change every 150,000 kilometers. 

However, unlike the engine oil routine service, you will rarely encounter a transmission fluid change. 

Most new car models come with a fluid that lasts for a lifetime, but a frequent check on its vitals is not a bad idea. Remember to check your owner’s manual for the prescribed support plan that best suits your vehicle.

If you have noticed red-rusted drops on the ground, that could be an indication of a transmission oil leak or even a break. Visit your nearest mechanic to help ensure the safety of your transmission and the quality of its fluids.

  • How to Check your Transmission Oil?

Unlike automatic transmission cars, most manual transmission cars don’t have the transmission dipstick. For the majority of manual vehicles, it is ideal to have a professional mechanic help.

  1. Park the car on a flat surface level, and keep the engine running and fully warmed up.
  2. Locate the transmission fluid dipstick. Similar to the engine oil dipstick, usually it is the second of two dipsticks on the engine that is colored in red.
  3. Similar to the engine oil process, pull the dipstick out, wipe it with a clean cloth, and reinsert the dipstick again.
  4. Pull the dipstick and check the fluid level readings. 
  5. The fluid level should be between the two grooved marks located on the dipstick; the warm and cool marks, closer to the warm mark.
  6. If the fluid level falls below the cool mark, add some fluid using a long funnel.
  7. Wipe the dipstick again and check it for the second time. 
  8. Still low? Continue on adding some fluid and recheck it again. But be careful not to overfill it, as it can lead to other transmission problems.

3. Coolant:

  • What is Coolant?

Most of the energy produced in your car converts into heat. For that, coolant helps in preventing motor harm by absorbing the heat caused by extreme temperatures, overheating or even freezing, and throwing it out through the exhaust.

In other words, without an ideal coolant, your engine would reach extreme temperatures beyond its tolerance levels that might even cause an engine melt.

Not only that, but it also protects metals and non-metallic elastomers (like elastic and plastic parts) in the motor and the cooling circuit from excessive heat.

Engine tech is improving everyday, and changing intervals of coolant oil is changing with it. 

20 years ago, the norm was to change the coolant every two years. Nowadays, it can reach as long as 5 to 10 years before a change is needed, as some new cars are built with an effective lifetime coolant.

  • How to Check your Coolant?

Before checking your coolant level, make sure that your engine isn’t hot! Be aware of opening the radiator cap when the engine is running or if it's still hot, as the system will be highly pressurized as the fluids are extremely hot! This could cause severe injuries and burns.  

  1. Take the car for a small trip.
  2. Park the car on a flat surface level, and turn off your car.
  3. Let it cool down for at least 15 minutes. 
  4. You can observe the coolant fluid level using the minimum and maximum markers on the coolant tank.
  5. If the fluid level falls below the minimum mark, open the radiator cap safely using a cloth.
  6. Fill the tank with the correct coolant grade until you see the fluid level is near the top cap, or until its level is between the coolant reservoir marks.

4. Brake Fluid:

Always remember to check on your brake fluids to ensure your safety


  • What is Brake Fluid?

As a start, you should know that your brakes won't work without brake fluid. 

What happens is that brake fluid pressure pushes down to your brake pads, and against the cars’ rotor (or disk brakes for their circular shape), slowing your car speed down as needed.

It's a hydraulic system that is supposed to happen instantaneously. But if you begin to experience an abnormal, faulty,  or delayed brake response, brake fluid should be the first thing that comes into your mind to check, as it could be low in quality and quantity.

Obviously, you want your brakes to be working in a top and excellent condition at all times to ensure your safety and your passengers'! Therefore, experts recommend changing brake fluids every two years, as contamination with water could happen over time since it's being hygroscopic (absorbs moisture from the air).


  • How to Check your Brake Fluid?

Cars, in general, shouldn’t consume brake fluid, no matter its age or its heavy-usage. But if you noticed a low level of fluid, have your car checked by the mechanic to find out the causing reason. There could be a leak or a worn out steal that could cause brake failure. 

  1. Pop the hood open.
  2. On the driver's side, scan the compartment for a plastic reservoir usually labeled with “brake fluid”.
  3. Wipe any dirt, dust, or dirbs off the exterior surface of the reservoir for a clear reading.
  4. Similar to all reservoirs, simply observe its level using the minimum and maximum marks on the tank.
  5. If you can’t still get a good look at the fluid, twist the cap open and peek inside. But remember not to keep it open for more than 15 minutes, as air moisture would ruin the fluid.
  6. If the fluid level falls below the minimum mark, using the right brake fluid type, fill the tank until you see the fluid level is near the top cap, or until its level is between the reservoir marks.

5. Power Steering Fluid:

  • What is Power Steering Fluid?

Ever wondered how it would feel like to drive a car without a power steering fluid? Imagine using high force and pressure just to maneuver and turn the steering wheel. Sounds like a bit of a workout!

Power steering fluid is one of the vital fluids that aids in maintaining the balance and control of your car's wheel. It helps in transmitting the power to the steering system. This will allow your car to steer effortlessly.

To prevent and avoid the jacky feel of steering the wheel, experts recommend a periodic change of every two years, or an average of 80,000 kilometers to maintain the smooth steering experience. 

  • How to Check your Power Steering Fluid?

Remember to always start by checking your owner's manual, as it will indicate the reservoir location and the right fluid for your car needs.

  1. Pop the hood open.
  2. On the passenger side closer to the belts, scan the compartment for a plastic reservoir usually labeled with “Power Steering Fluid”.
  3. Wipe any dirt, dust, or dirbs off the exterior surface of the reservoir for a clear reading.
  4. Similar to all reservoirs, simply observe its level using the hot and cold marks on the tank. 
  5. In some cases, there might be two pairs of lines; one for a hot engine as the other for a cold engine. Check the one that represents the current status of your vehicle.
  6. If you can’t still get a good look at the fluid, twist the cap open, as some reservoirs may have a dipstick attached to the cap. 
  7. If the fluid level falls below the mark, using the right fluid type, fill the tank until you see the fluid level is near the top cap, or until its level is between the reservoir marks.

6. Gear Oil:

  • What is Gear Oil?

Unfortunately, gear oil is one of the most neglected oils by car owners. They believe that gear oil does not need to be changed at all, but rather to top it off to its required level, which is wrong! 

Like any other car oil, gear oil lubricates the inner parts of the gearbox that provides a smooth, safe, & comfortable ride with flawless performance. 

Gears encounter harsh conditions and extreme temperatures, such as high friction, corrosion, and the effects of extremely high and low temperatures. Those can reduce the performance and lifespan of your vehicle. 

And to prevent from getting high repair costs, gear oil should be changed periodically. Depending on car heavy usage, experts advise changing the gear oil after an average of 40,000 - 60,000 kilometers.

  • How to Check your Gear Oil?

Different cars have different models of gear. For that,  always start by checking your owner's manual, as it will indicate the gear type, its location, and the proper gear oil type.

  1. Take the car for a small trip.
  2. Park the car on a flat surface level, and turn off your car.
  3. Let it cool down for at least 15 minutes. 
  4. Locate the dipstick. It is often located near the back of the engine. If your vehicle model doesn’t have one, you may need to raise it using the jack or lift, then carefully remove the transmission fill cap located on the transmission assembly.
  5. Pull the dipstick out of the filler tube, wipe it with a clean cloth, and reinsert the dipstick again. If the car is raised, insert a ruler, screwdriver, or other implements into the system to sample the oil.
  6. Pull the dipstick and check the oil level readings. 
  7. The oil level should be between the two grooved marks located on the dipstick; the hot and cold marks, closer to the hot mark.
  8. If the oil level falls below the cold mark, add some gear oil using a long funnel.
  9. Wipe the dipstick again and check it for the second time. 
  10. Still low? Continue on adding some oil and recheck it again. 

7. Differential Fluid:

  • What is Differential Fluid?

Another overlooked maintenance fluid is the differential fluid. Since its location on the rear and under the vehicle, usually it gets forgotten.

Differentials provide the smooth control of the outer wheels of your vehicle and help in maintaining proper distance between outer wheels and inside ones. It allows the car to make turns and go around corners without any drama.

Similar to any other fluid, changing it is as important as changing your engine oil. From the high metal to metal friction and more, it is recommended to change the differential fluid every 50,000 - 100,000 kilometers.


  • How to Check your Differential Fluid?

usually, your car's differential will look like a pumpkin-shaped metal mounted between the rear wheels


Depending on your vehicle design, checking and changing the differential fluid can be a very messy or a very easy job. As some might have a drain plug; while others require the housing cover removal. 

Never forget to always start by checking your owner’s manual, as it will indicate the right fluid type and its location on the vehicle.

  1. Park the car on a flat surface level, and have it raised equally using the jack or lifting system.
  2. Locate the differential. Look for the pumpkin shaped metal object mounted between the rear wheels.
  3. Find the fill/drain service port. Inspect the port visually for any signs of damage.
  4. Clean the area around the service port with brake cleaner and a steel bristle brush.
  5. Using a ⅜ inch drive ratchet, turn the service port counter clockwise to open.
  6. Insert one finger into the service port, slightly bend it downward to check if your finger encounters the fluid level. 
  7. If your finger touches the oil, then you are good to go. If not, then it’s low.
  8. To top it off, insert the long spout into the service port. 
  9. Squeeze the bottle slowly to push the oil out and into the differential until fluid begins to leak out of the port.
  10. Once done, make sure to wipe the leaked fluid and secure the service port by turning the plug clockwise.